Updating a withdrawal bank account
Update your withdrawal accounts online.

A nominated bank account is an external bank account that is linked to your Netwealth platform account for the purpose of withdrawals. You may set up multiple nominated back accounts for ad-hoc withdrawals, and one nominated account set up for automatic ongoing monthly withdrawals.
In this module we will cover
Check to see if your required bank account is already connected by navigating to My details > Bank settings.
Check to see if the required bank account is already connected by selecting a client and then navigate via the main menu to Client details > Bank settings.
Users can nominate a bank account that’s held in their name, a joint bank account that they’re an account holder of or a super fund in which they’re a member. An automatic validation is performed when the user clicks Submit. If the name fails the automatic validation, we’ll need to approve the transaction by manually checking the bank account name. If the account name before the account is added If the transaction is not approved, we will notify both adviser and investor.
If the account requires a joint signoff, the users can update bank details online if they’ve authorised us to act upon instructions signed by one signatory only via their initial application.
Navigate using the main menu to My Details > Bank Settings to add or amend your nominated (or withdrawal) bank details.
Add a new bank account or amend existing bank details, then click Submit.
We’ll send you a text message, or an email if no mobile number is on file, confirming the change. For security purposes, we may call you to confirm your instructions and to validate your details.
See section A or B below depending on whether your client has online access or not.
Search for and select the client account and then navigate using the main menu to Client Details > Bank Settings. Select the Bank Details tab.
Add a new bank account or amend existing bank details, then click Submit.
Click Submit. You’ll be able to compare the new and old bank details before Confirming the updated details.
a) A notification we be sent to your client alerting to them of the change via text message, or an email if no mobile number is on file.
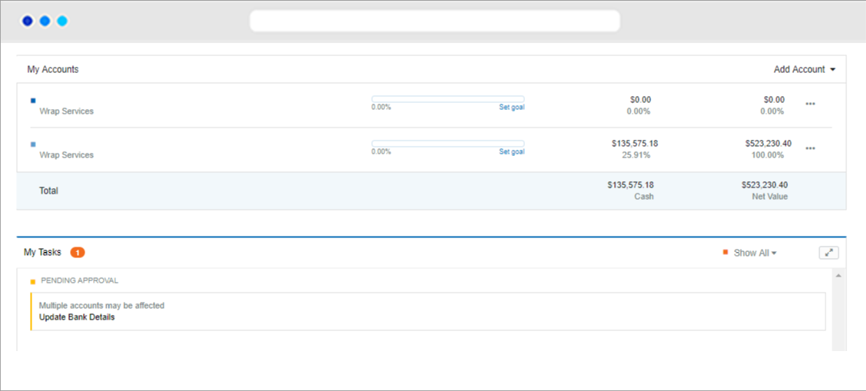
b) To accept the change they will need to log into their client portal and from the Dashboard navigate to the task in ‘My Tasks.’
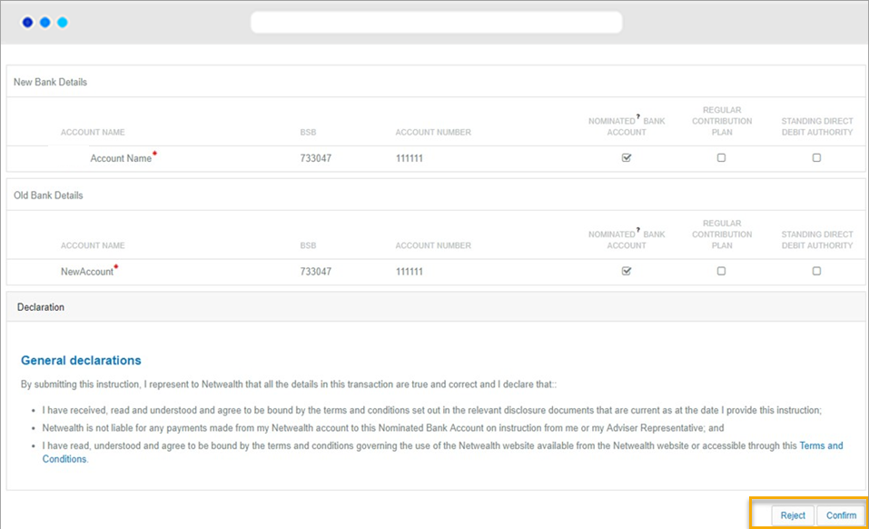
c) They will then click on the task where they will be taken to a page to Confirm or Reject the updated bank details.
d) We’ll send your client a text message, or an email if no mobile number is on file, confirming the change. For security purposes, we may call them to confirm your instructions and to validate their details.
Navigate using the main menu to Forms & Research > Super Accelerator or Wealth Accelerator and download the 'Nominated bank account' form.
Advanced tip: Complete the form by adding the new account detail and have your client sign using their preferred method, which includes the use of digital signatures.
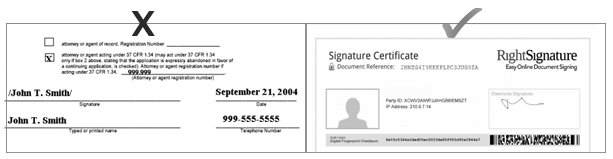
Note that we cannot accept click-to-sign signatures, we can accept signatures that involve the signer applying their hand-signature mark on the document with the additional protection of a cryptographic digital signature. For more information on our digital signature service, click here.
Navigate using the main menu to Activities and Tasks > Document Upload and upload the signed form.
Advanced tip: If you do not upload your form via the secure document uploader, the original signed from will need to be posted to Netwealth and digital signatures would not be accepted in this case. For more information on our document upload process, click here.
For security purposes, the Netwealth account holder may receive a call from Netwealth to confirm that your client is aware of the instruction to add the additional nominated account. When the new account details are updated, the Netwealth account holder will receive a text message confirming the change.

For an in depth look at this great feature, or any of our other platform enhancements, request for one of our team to contact you.